List view
The Science
The Science
Product Manual
Product Manual
Product Maintenance
Product Maintenance
FAQ
FAQ
App Set Up
Instructions
Here you’ll fine instructions on how to setup the app on your smartphone, automate your system, and notes about scheduling.
To get started you will need:
WARNING
If you aren’t interested in using the app to control your ice bath, to turn it on and off daily for you, then you need to leave it running 24-7 otherwise the water will foul.
If you aren’t interested in using the app to control your ice bath, to turn it on and off daily for you, then you need to leave it running 24-7 otherwise the water will foul.
Tuya Smart App
Convenience & Control
The app is useful because it automates running your ice bath daily but not all day. You’re downloading it so you can setup the scheduling feature and to turn it off or on at your convenience if you’re away for any reason.
With a little trial and error you can gauge how long it takes to cool to your desired temperature and how fast it warms throughout the day thereafter determining what temperature it will be later if you want to submerge again.
Sample Schedule
Let’s go through an example so you have an idea of how you might schedule your ice bath;
PRO TIP
It’s more efficient to cool your water while you sleep, as evening temperatures are generally cooler overnight.
It’s more efficient to cool your water while you sleep, as evening temperatures are generally cooler overnight.
Sample Schedule
1x morning ice bath routine at 43ºF/6ºC
1x morning ice bath routine at 43ºF/6ºC
- Chiller ON: 2am-8am
- Ice Bath Window: 7am-8am
- Chiller otherwise OFF all day
* Setup multiple schedules to keep the temperature low to submerge multiple times per day.
YOU SHOULD KNOW
When not in operation, you can expect the water temperature to rise by ~2ºF/1ºC per hour.
When not in operation, you can expect the water temperature to rise by ~2ºF/1ºC per hour.
A little trial and error will help you figure out how to get the temperature exactly where you want it when you want to submerge. Let it run for 6-8 hours each day to start and slowly reduce the time until it doesn’t reach the desired temp at the time you want.
Initial Setup
Connect to the App
- Make sure your chiller is on and hold the “W” button until you hear a beep and the WIFI symbol on the control panel begins flashing.
→ Your ice bath is now discoverable.
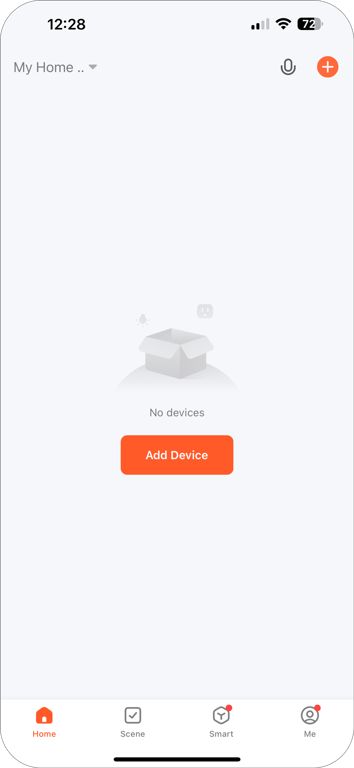
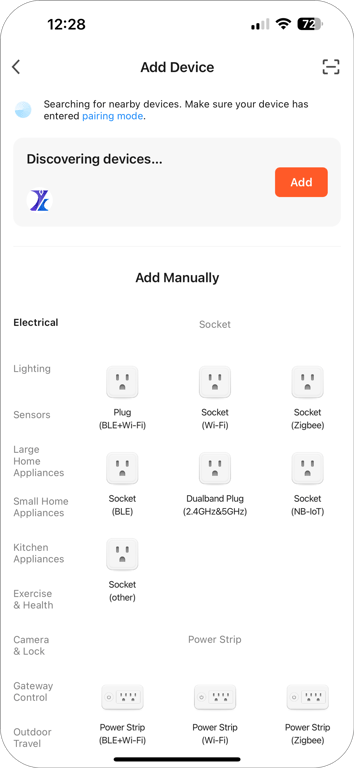
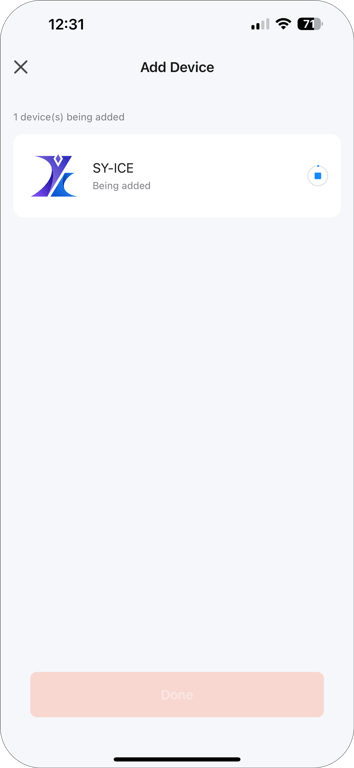
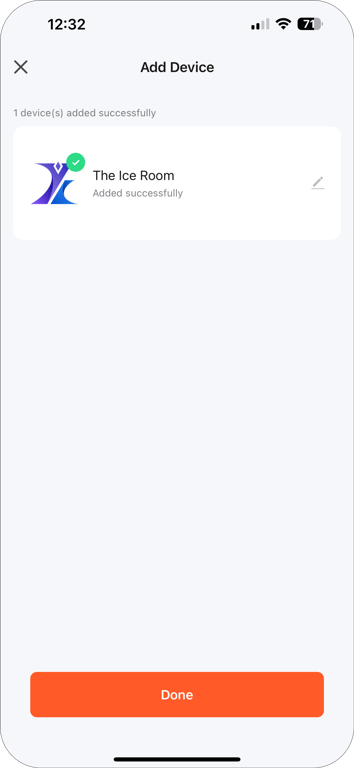
- Open the Tuya app on your smartphone, and press “Add Device”
- The app will show your chiller as discoverable at the top of the screen. Press “ADD.”
- If the app isn’t discoverable press and hold the “W” button on the chiller again and restart the app.
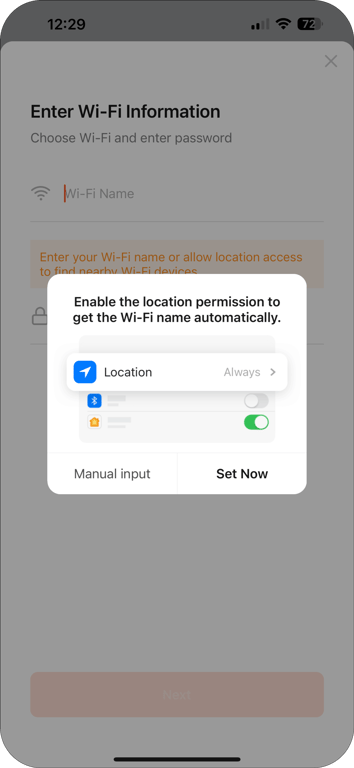
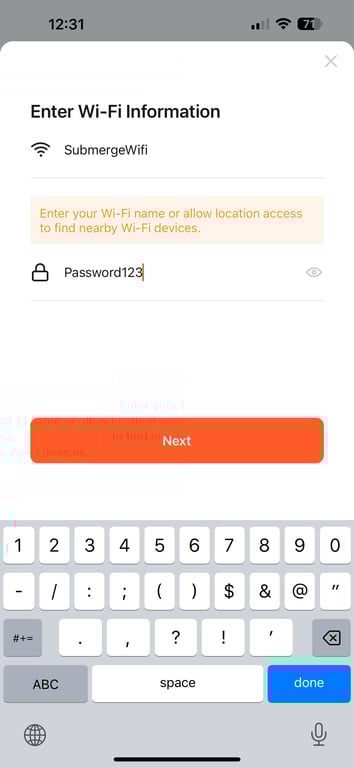
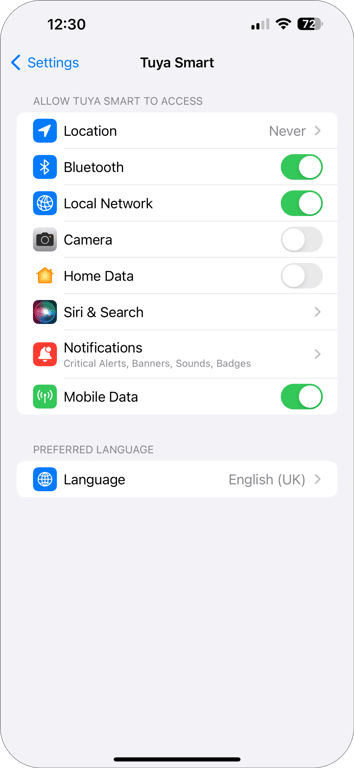
- The app will ask to access your home internet connection. You can add your wifi network name and password manually or set the app location access settings to ALWAYS. You can do either.

- Once complete you will see a processing screen before successfully completing. You can now control your ice bath from your phone.
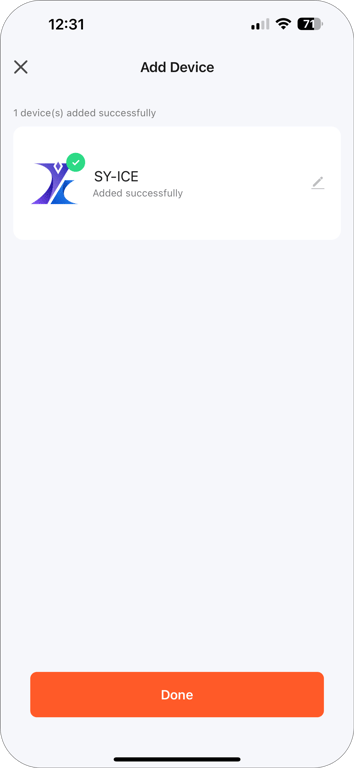
- By selecting the pencil icon you can rename the network to something fun.
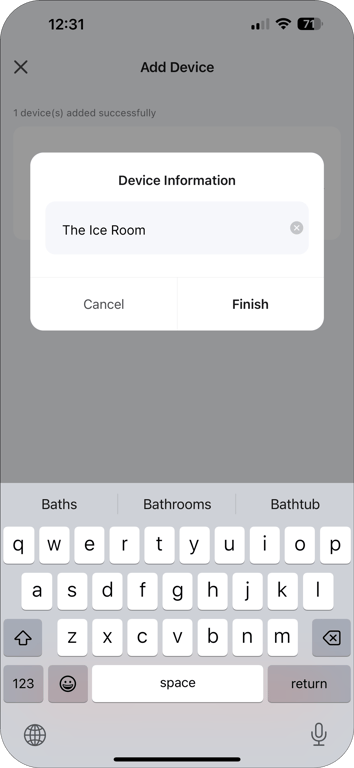
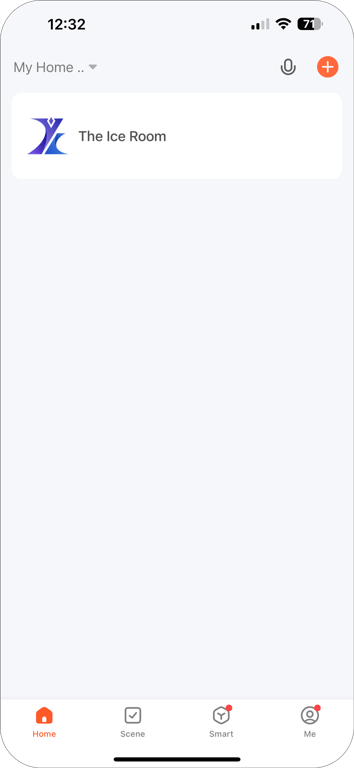
- It will now appear on the main device home screen.
- Click on it to access the digital control panel of your ice bath.
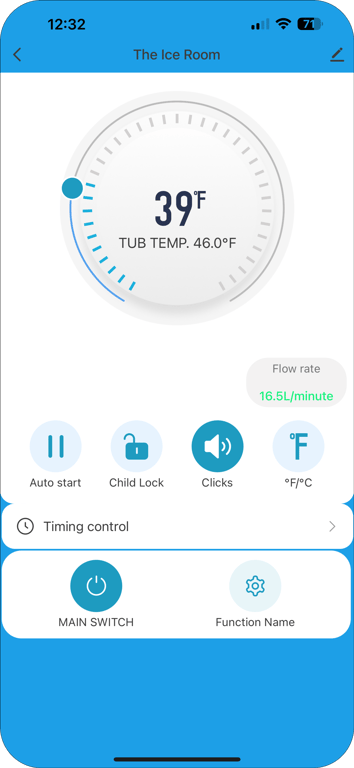
App Control
Setting the Temperature
- Start by setting the temperature using the touch wheel.
- You can set between 37ºF (3ºC) and 107ºF (42ºC).
NOTE
The wheel shows colder and hotter temperatures but 37º-107ºF (3º-42ºC) is all that is achievable with this chiller.
The wheel shows colder and hotter temperatures but 37º-107ºF (3º-42ºC) is all that is achievable with this chiller.
App Automation
Setting a Schedule
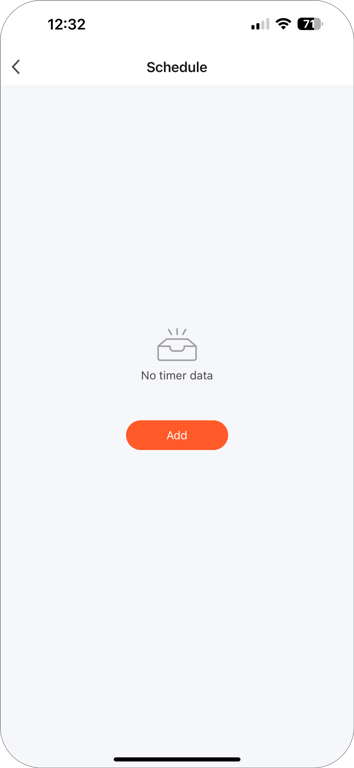
Select “Timing Control” and then “Add” to create your tub schedule.
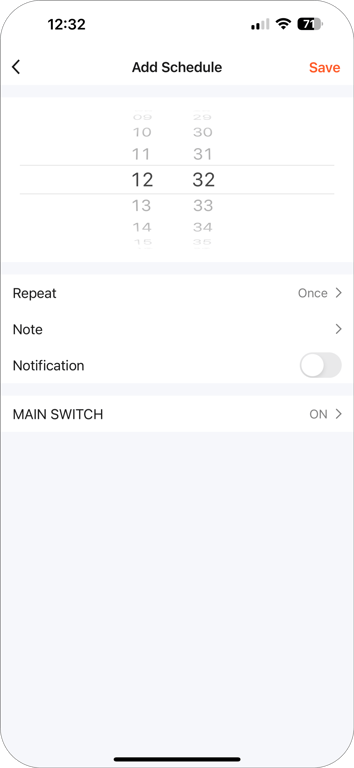
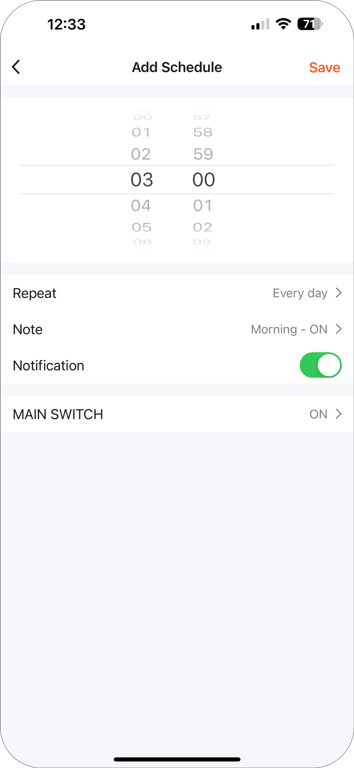
Set the start time
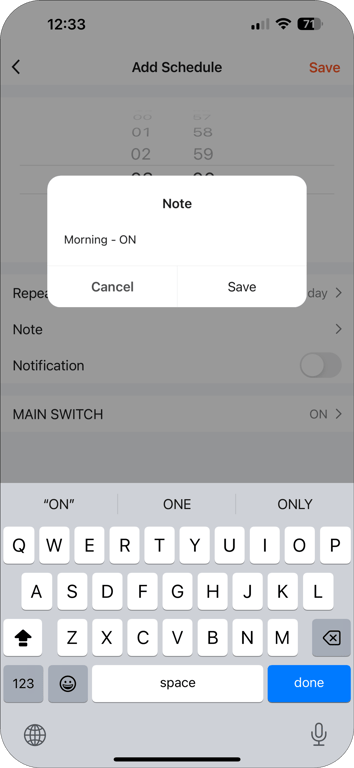
Label the action with a note, turn NOTIFICATIONS to ON (green), and set MAIN SWITCH to ON.
YOU SHOULD KNOW
Each “Schedule” is an action. You need at least 2 “Schedules” to indicate when to turn ON and when to turn OFF.
Each “Schedule” is an action. You need at least 2 “Schedules” to indicate when to turn ON and when to turn OFF.
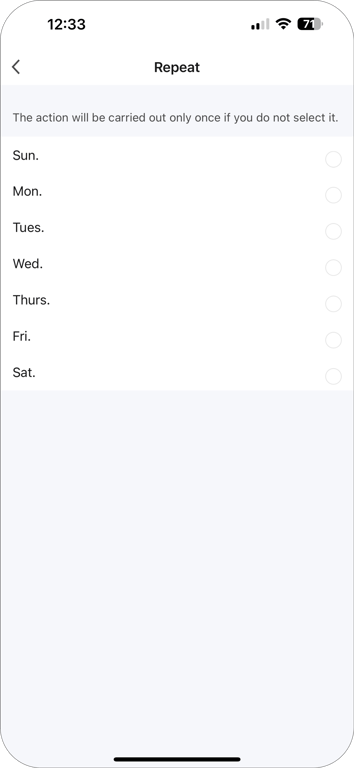
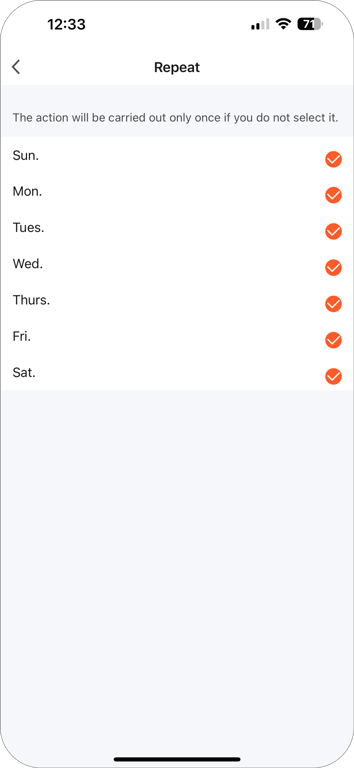
Set the schedule to repeat daily
This is what a scheduled action for turning the ice bath on everyday at 3am looks like.
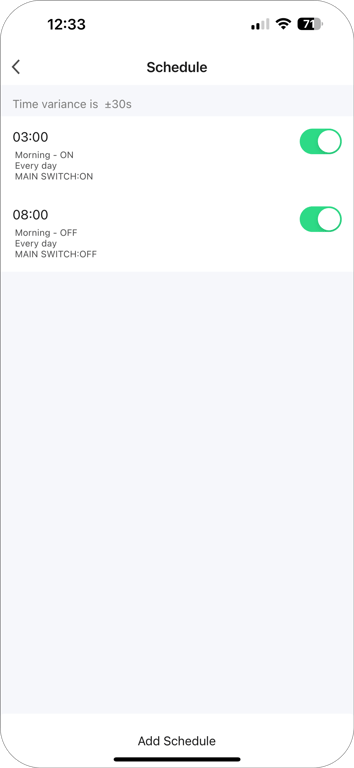
Hit save to return to the main screen and create a second Schedule to turn the ice bath off.
Setting and OFF Schedule
This is what a scheduled action for turning the ice bath off everyday at 8am looks like.
And this is what the main schedule screen should look like after completing an on / off loop.
Notifications and the Note label are important because your phone will push a notification to you each time it activates a schedule.
It will indicate the action was executed successfully or that there was a problem. If there was a problem due to wifi network instability for example you can simply open the app and turn the machine off or on directly.

You are now scheduled, good luck Submerging!
 Made with Bullet